


.png)

What is an Evaporator Coil?


Government Rebates Now Available on Energy-Efficient Air Conditioners when Replacing your Gas Heater.
An evaporator coil is the indoor heat exchange component in an air conditioning or heat pump system that absorbs heat and moisture from conditioned air, causing refrigerant inside the coil to evaporate and carry heat away. This explanation of the evaporator coil at the outset clarifies how AC coil function directly influences comfort, humidity control, and system efficiency for homeowners and facility managers alike. From Oz Air Group's experience servicing residential and light commercial HVAC systems, a well maintained evaporator coil is one of the fastest ways to restore lost cooling capacity and improve evaporator coil efficiency. Many folks notice reduced cooling, higher energy bills, or an evaporator coil freezing up before they even twig to a coil problem. This guide promises practical workflows, linking symptoms to causes and then to actions, to help you diagnose, maintain, and decide when to repair or replace. No worries, we've got you covered. The article maps the refrigeration process, compares refrigerant coil types and materials, walks through common HVAC evaporator coil issues and troubleshooting, provides step by step guidance on how to clean an AC coil safely, and explains cost to replace considerations with replacement service expectations. So, read on, mate, to learn how the evaporator coil interacts with the compressor, condenser coil, expansion device, air handler, and ultimately, your indoor comfort goals.
What is an Evaporator Coil and How Does It Work in Your HVAC System?
An evaporator coil is an indoor coil, often called the indoor coil or AC coil, that removes heat from air by evaporating low pressure refrigerant inside a matrix of tubes and fins, thereby cooling and dehumidifying the passing air. The mechanism relies on refrigerant entering as a low pressure liquid, absorbing sensible and latent heat while vaporising, and then returning to the compressor as a low pressure vapour, which keeps indoor spaces comfortable and reduces humidity. Proper evaporator coil function improves SEER2 effective efficiency and supports Energy Star level performance when paired with correctly matched outdoor equipment. Getting your head around this coil’s role helps homeowners diagnose evaporator coil symptoms quickly and stops those little HVAC evaporator coil issues from turning into a real drama.
What role does the evaporator coil play in the refrigeration cycle? Below is a concise three step summary for quick reference and featured snippet optimisation:
- Refrigerant enters the evaporator coil as a low pressure liquid and absorbs heat from indoor air, evaporating into vapour.
- The compressor then raises refrigerant pressure and temperature, sending it to the condenser coil outdoors where heat is rejected.
- An expansion device meters refrigerant back to low pressure for the cycle to repeat.
This step by step view sets up the next section, explaining how the coil affects cooling and dehumidification, and why a bit of dirt or a pesky leak can really change what you'd expect.
What Role Does the Evaporator Coil Play in the Refrigeration Cycle?
The evaporator coil is the site of evaporation where refrigerant absorbs heat and changes phase from liquid to vapour, enabling the refrigeration cycle to remove indoor heat effectively. Heat transfer occurs across metal tubes and fins. As warm return air passes the coil, its temperature drops and moisture condenses on the fin surface, delivering lovely, dehumidified air to your living spaces. The coil’s efficiency depends on surface area, fin spacing, clean surfaces, and proper refrigerant charge. All these factors influence how much heat the coil can absorb per unit time. Understanding this phase change mechanism helps technicians and homeowners alike interpret symptoms like reduced cooling or higher humidity as signs of impaired evaporator coil efficiency, leading naturally into maintenance and troubleshooting procedures. Fair dinkum, it's all about keeping things running smoothly.
Educational Refrigeration System: Design and Operation of an Ice Rink Evaporator Coil
This paper, as Part 2 of an educational project, details the construction and operational procedures of a didactic refrigeration system for an artificial ice rink. Building upon Part 1, this work defines the configuration of a vapour compression cycle with direct expansion, utilising a ¼ HP condensing unit with R22 and accessory components for expansion, control, and safety. Construction aspects encompass mechanical arrangements, thermal insulation, and the integration of a copper coil evaporator within a concrete block. Operational protocols are proposed for start up, commissioning, and adjustment, with a focus on superheating, subcooling, and pressure regulation. Leak detection, dehydration, and charging procedures are also included to ensure system reliability. The system provides a cooling capacity of 430 kcal/h, achieving –6 °C at the rink surface, with a coefficient of performance of approximately 3.16. Beyond its practical application, the system functions as a didactic platform for experimental validation.
Educational refrigeration system project for the generation of an ice rink: part 2, 2025
How Does the Evaporator Coil Affect Cooling and Dehumidification?
An evaporator coil directly impacts both temperature drop and moisture removal by creating conditions where air is cooled below its dew point and moisture condenses into the drain pan, reducing indoor relative humidity. In our humid climates, a properly sized and clean coil can really knock down indoor humidity, making things much more comfy and cutting down on mould risk. On the flip side, dirty or undersized coils just won't pull their weight, leading to higher indoor humidity. Reduced dehumidification often shows up as clamminess, longer cooling cycles, and sometimes water dripping where it shouldn't, a clear sign it's time for a squiz. Recognising the connection between a clean coil, good airflow, and proper dehumidification really sets the stage for the preventative maintenance actions we'll chat about later.
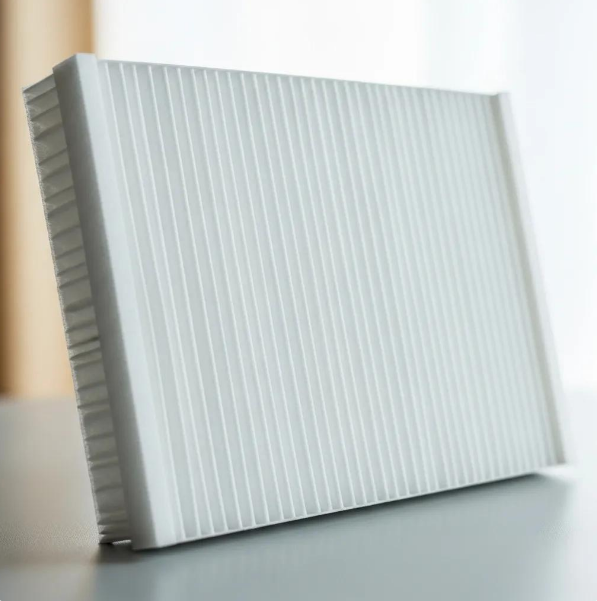
What Are the Different Types of Evaporator Coils and Their Applications?
Evaporator coil designs vary. Common forms include A-coils, N-coils, and slab coils, each suited to specific equipment configurations and retrofit scenarios, while cased versus uncased designs determine installation ease and drain pan integration. Picking the right coil should always match your air handler or furnace setup, the refrigerant type, and any space constraints you might have. Material choices, like copper versus aluminium, also play a big part, influencing thermal performance, how well it resists corrosion, and how easy it is to fix. Choosing the correct refrigerant coil type and material helps you steer clear of compatibility dramas with modern refrigerants (like R-22 being phased out in many markets, with R-410A and R-32 as common alternatives around 2025), and ensures a much better evaporator coil lifespan. No one wants a system that's not up to scratch!
Here's an introductory comparison of coil types, typical designs, and practical applications:
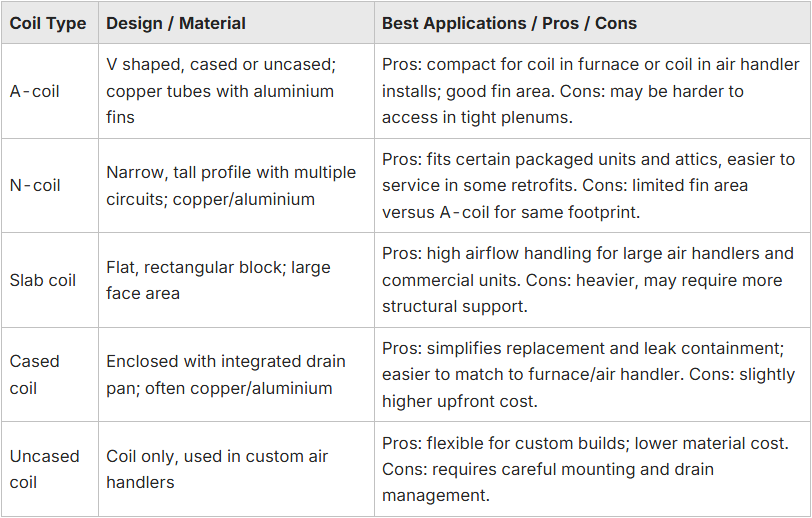
This table highlights the trade offs, so you can match the coil design to your system type, which then leads us into more detailed installation and material considerations below. Easy as pie!
How Do A-Coils, N-Coils, and Slab Coils Differ?
A-coils form a V shape that maximises fin surface within a compact depth and are commonly used with furnaces where space is limited. N-coils run taller and narrower to fit specific air handlers or packaged units, and slab coils provide a broad face area for higher airflow in larger handlers. Installation considerations include access for cleaning, availability of matching replacement coils, and compatibility with expansion valves and metering devices. Retrofit scenarios often determine whether a homeowner chooses a cased A-coil or an uncased slab coil based on cabinet dimensions and how the coil will mate with existing ductwork.
Getting your head around these form factor differences guides efficient replacements and really cuts down the risk of mismatched SEER2 outcomes. You want your system to be a ripper, not a dud!
Optimizing Evaporator Coil Design for Energy Efficiency and Thermal Comfort in Rooftop HVAC Systems
This paper introduces an optimisation simulation approach to investigate the energy saving potential of an air cooled direct expansion rooftop package air conditioning system. This is achieved by refining the models of HVAC system components and deriving an optimal evaporator coil configuration subject to technical constraints. In this methodology, the frontal area of the evaporator coil is held constant, while the impact of variations in other geometrical parameters on the system's thermal and economic performance is examined. Experimental data were collected from an actual air cooled rooftop package installed in a commercial building located in a hot and dry climate. Both system inputs and outputs were measured during two weeks of field monitoring in the summer. Using the collected data and mathematical models, modules incorporating the proposed optimal redesign procedure were integrated into a transient simulation tool. A hybrid heuristic deterministic optimisation algorithm was implemented within the transient tool to determine the synthesis and design variables influencing the cost and energy efficiency of each configuration. The model was validated by comparing available experimental results with predicted outcomes. Subsequently, the computer model was employed to predict the effects of changes in cooling coil geometry on the building's thermal comfort, as well as the system's cost and energy consumption.
Thermo economic optimisation of rooftop unit's evaporator coil for energy efficiency and thermal comfort, V Vakiloroaya, 2014
What Are the Benefits of Cased versus Uncased Evaporator Coils?
Cased evaporator coils include a cabinet and integrated drain pan, simplifying installation, sealing, and replacement. This is why many technicians prefer them when replacing coils in standard furnace or air handler cabinets. Uncased coils are common in custom air handler builds and can reduce material cost, but require additional framing, insulation, and proper drain pan design to avoid leaks. Homeowners should lean towards cased coils when they're after an easier swap out and better built in leak control. Uncased coils, on the other hand, are more for those bespoke systems where space and customisation are more important than ease of replacement. It's all about what suits your setup, mate. Knowing these distinctions helps homeowners plan for maintenance accessibility and those potential evaporator coil leak repair scenarios. Better to be prepared, right?
Which Materials Are Used for Evaporator Coils and Why?
Evaporator coils typically use copper tubes with aluminium fins due to copper’s excellent thermal conductivity and aluminium’s lightweight, cost effective finning. However, full aluminium or copper aluminium hybrid designs also exist to balance cost, corrosion resistance, and performance. Copper offers easier field repairability (soldering or brazing) and generally better long term serviceability, while aluminium fins can be coated to improve corrosion resistance at lower cost. Emerging coatings and microchannel designs address corrosion and refrigerant containment. The material choice really affects the expected evaporator coil lifespan and influences whether a coil prone to leaks is economical to repair or if it's time to bite the bullet and replace it. This is all pretty relevant to those replacement decisions we'll chat about later.
What Are Common Evaporator Coil Problems and How Can You Troubleshoot Them?
Evaporator coil problems commonly present as reduced cooling capacity, short cycling, unusual odours, water leaks, or a coil that freezes up, and each symptom maps to a set of potential causes and immediate diagnostic checks. Troubleshooting means you've got to tell the difference between airflow issues (like dodgy filters or a struggling blower), refrigerant problems (leaks or not enough charge), and heat transfer degradation (dirt or corrosion). It's a bit like being a detective, really. A few quick, safe checks you can do at home, combined with a technician's tests, form an effective triage flow. This helps separate the problems you can temporarily sort out from those needing certified refrigerant handling and a proper coil repair. No mucking around with the serious stuff!
Typical mappings from symptoms to causes and then to quick fixes are listed below to help homeowners triage before calling for service:
- Reduced cooling output: Often caused by dirty coils, clogged filters, or low refrigerant charge. Check and replace filters, visually inspect evaporator fins, and ensure vents are open.
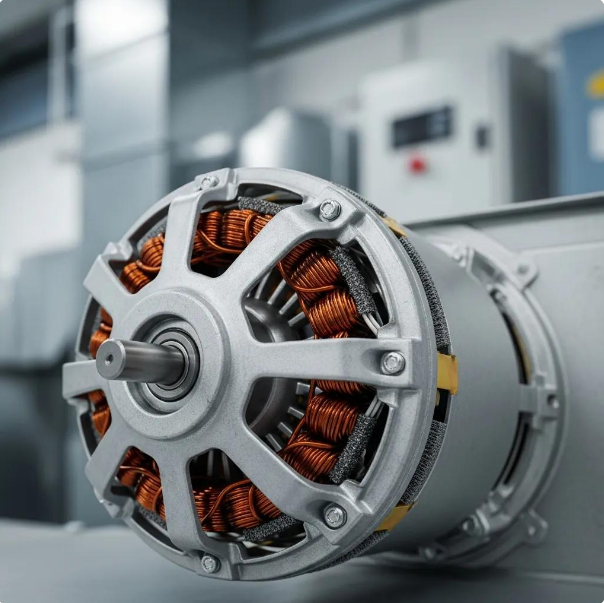
- Evaporator coil freezing up: Common causes include restricted airflow (dirty filter, blocked return), low refrigerant, or a faulty blower motor. Safely turn the system off to thaw and then inspect airflow and filter conditions.
- Poor dehumidification or wet return air: Caused by insufficient coil surface temperature or dirty coil surfaces limiting condensation. Clean the coil and verify proper airflow.
- Hissing or oil stains near coil: Signs of a refrigerant leak. Don't even think about DIY refrigerant repair, you'll need to call a certified technician for detection and sealed system repair.
These immediate checks lead into professional diagnostics and preventative measures that reduce recurrence.
What Causes a Frozen Evaporator Coil and How Can It Be Fixed?
A frozen evaporator coil results when the coil surface temperature drops below freezing long enough for condensate to accumulate and freeze. This is typically caused by restricted airflow (dirty filters, blocked returns), low refrigerant causing evaporating temperature to fall, or a failing blower motor reducing air volume. Immediate homeowner safe steps are to turn the thermostat to OFF and the fan to ON to thaw the coil while placing towels under the cabinet to catch water, followed by checking and replacing the filter and clearing return grilles. Professional repair involves measuring the refrigerant charge, checking for leaks, testing blower amperage and airflow, and then restoring proper airflow or sealing and replacing any faulty components. It's a thorough job to get things back on track. Preventing freeze ups relies on regular airflow maintenance and addressing refrigerant issues promptly.
How to Detect and Repair Evaporator Coil Leaks?
Detecting coil leaks combines visual inspection for oil stains, pressure and recovery tests by a certified technician, and electronic or UV dye leak detection methods. Homeowners can look for sudden performance drops or icy lines as early indicators. DIY leak detection is limited and temporary measures like using stop leak products are generally not recommended because they can contaminate the system and complicate professional repair. Certified technicians perform proper evacuation, recovery of refrigerant, brazing or coil replacement, and pressure testing. Repair versus replace depends on leak size, coil age, and material. Small, accessible leaks on newer coils may be repairable, while widespread corrosion or multiple leaks often justify replacement. Because refrigerant handling is strictly regulated, certified professionals should always manage the recovery, charging, and documentation. You don't want to be on the wrong side of the law, or worse, damage your system.
How Does Dirt Buildup Affect Evaporator Coil Performance?
Dirt and biological growth form an insulating layer on the fins and tubes, cutting down heat transfer and making your system run longer. This typically means 10 to 20% higher energy use and less dehumidification in real world cases where coils are really mucky. Not ideal, yeah? Signs include reduced airflow, higher humidity, longer run cycles, and sometimes musty odours from mould growth. Left untreated, that dirt just speeds up corrosion and shortens your evaporator coil's expected lifespan. A bit of a bummer, really. Regular inspection and timely cleaning restore thermal contact between metal surfaces and moving air, improving evaporator coil efficiency and reducing energy cost impacts. Setting up a regular cleaning and filter replacement schedule stops dirt accumulation from turning into more severe HVAC evaporator coil issues. Prevention is better than a cure, as they say!
Energy Efficient Air Conditioning: The Significance of Evaporator Coil Maintenance and Filter Cleanliness
A clean air filter is instrumental in preventing the accumulation of particulate matter on the evaporator coil throughout its operational lifespan. This preventative measure is paramount for sustaining the optimal efficiency and performance of the air conditioning system. Inadequate maintenance practices, such as the neglect of routine filter replacement, can result in diminished cooling capacity and elevated energy consumption.
Energy Efficient Air Conditioning, 1999
How Should You Maintain and Clean Your Evaporator Coil for Optimal Efficiency?
Keeping your evaporator coil in tip top shape combines routine checks you can do yourself and scheduled professional service to keep that heat transfer humming along and avoid an early breakdown. Safe DIY cleaning covers the basics, while the pros handle the really mucky stuff, corrosion, and finding those pesky leaks. Recommended maintenance frequency depends on environment and use. A typical schedule includes filter changes every one to three months, visual coil inspection annually, and professional coil cleaning every one to three years depending on contamination. Proper maintenance really boosts your evaporator coil's efficiency, cuts down on HVAC energy consumption, and extends its service life. Now, let's walk through some practical DIY steps that are safe for homeowners, and clarify when it's time to give a pro a bell.
Just a quick note: This table helps you prioritise tasks and know when professional service is really warranted. No worries, we'll make it clear.
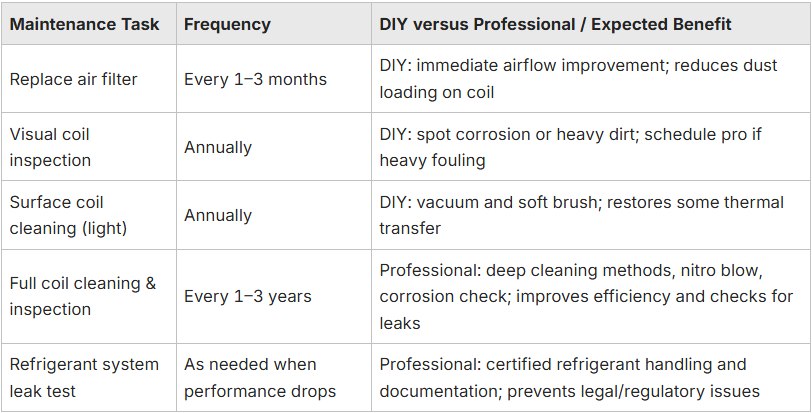
This maintenance framework clarifies which steps you can perform safely and when professional equipment and certification are necessary.
What Are the Step by Step DIY Evaporator Coil Cleaning Procedures?
Before you even think about DIY coil cleaning, make sure you shut off the power at the service disconnect and the thermostat. This ensures the blower and compressor stay off, and safety, mate, prevents damage or injury. Better safe than sorry! Use a soft brush or low suction vacuum to remove loose debris from the access panel area, then apply a no rinse, foaming coil cleaner per label directions, allowing it to loosen dirt for the recommended dwell time before returning power. After cleaning, allow the coil to dry thoroughly and inspect the drain pan and condensate line for blockages. Clear the drain with a stiff brush or a wet dry vacuum if accessible. If you spot heavy corrosion, extensive biological growth, or if restricted access stops you from getting a proper clean, just stop. Schedule professional service to avoid damaging the coil or causing a drama with your refrigerant system. Don't risk it!
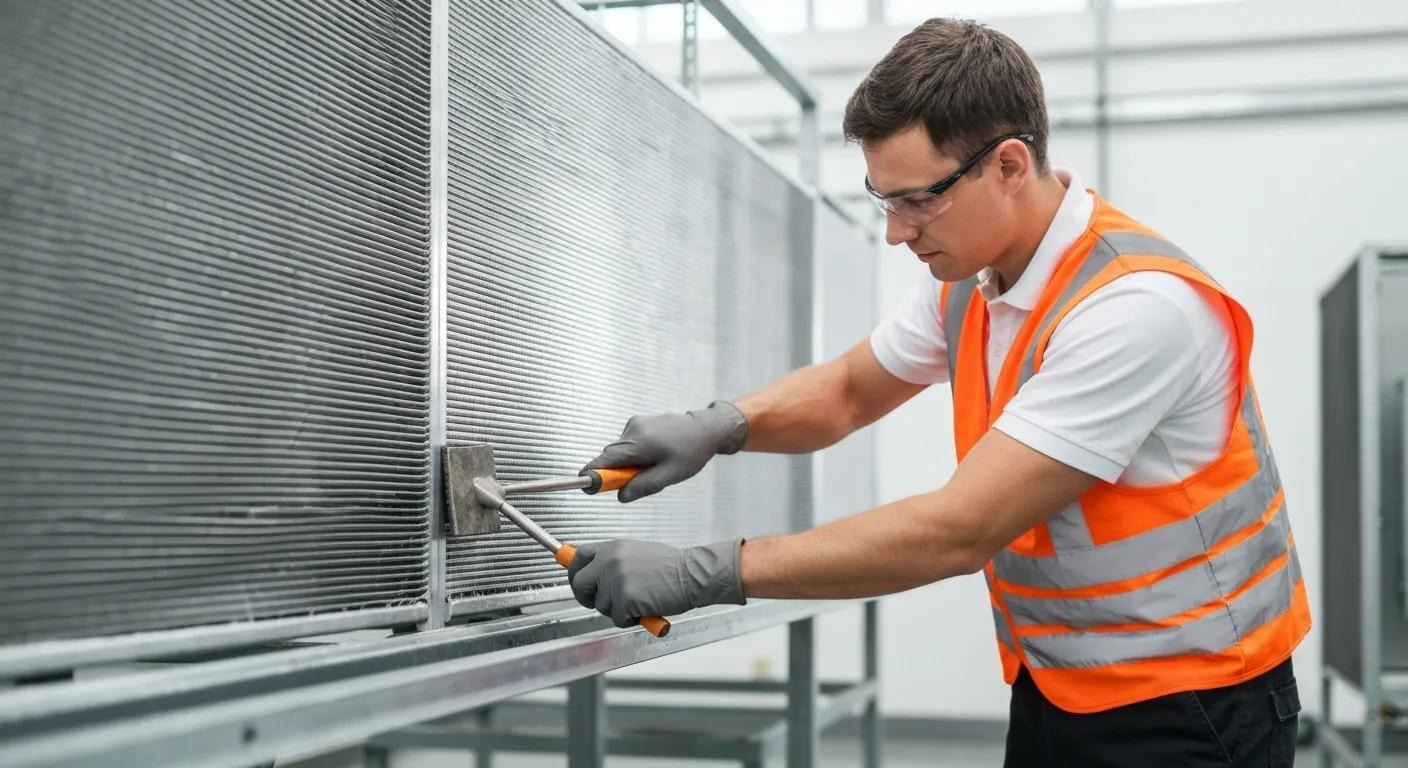
Why Is Professional Evaporator Coil Cleaning Important?
Professional cleaning uses specialised techniques, like controlled pressure rinsing, nitrogen blow through, and chemical treatments designed for HVAC metals. These methods get rid of deep fouling without damaging the fins or tube joints, and allow for a full diagnostic inspection of the coil assembly. It's a thorough job, no shortcuts. Certified technicians also perform leak detection, refrigerant pressure checks, and document any sealed system issues that could influence whether repair or replacement is the right path, ensuring regulatory compliance for refrigerant handling. Professional service preserves warranties, reduces long term operating costs through measurable efficiency gains, and identifies collateral problems like corroded drain pans or failing blower components. For these reasons, Oz Air Group recommends professional cleaning when access is a bit tricky, when coils show significant corrosion, or when your previous DIY efforts just haven't brought back the performance you'd expect. Sometimes you just need the experts!
In line with the maintenance strategy above, Oz Air Group provides inspection driven maintenance visits that include safe coil cleaning, diagnostic testing, and documented recommendations performed by certified technicians following industry safety and refrigerant handling standards. Our customers can expect a thorough inspection, clear recommendations for next steps, and a straightforward explanation of any potential compliance or warranty implications during those visits. We keep it fair dinkum.
When Should You Replace Your Evaporator Coil and What Are the Costs?
It's time to replace an evaporator coil when repeated leaks, significant corrosion, extensive fin or tube damage, or multiple repairs tell you the sealed system is just not reliable anymore. Or, if a replacement would really boost your system's efficiency and match up perfectly with a new outdoor unit for optimal SEER2 performance. You want a system that's a ripper, not a lemon! Replacement decisions should always weigh up the coil's age, the repair cost versus the replacement cost, refrigerant compatibility (especially if R-22 is involved), and its projected remaining life. This decision matrix ensures the money you spend aligns with the expected HVAC evaporator coil lifespan and your household's energy goals. It's all about getting the best bang for your buck. The next table breaks down common cost factors and estimated ranges to help you budget and compare options.
Just a heads up: Understanding what drives the costs clarifies why quotes can vary a bit, and what you can expect during a replacement. No surprises, mate!
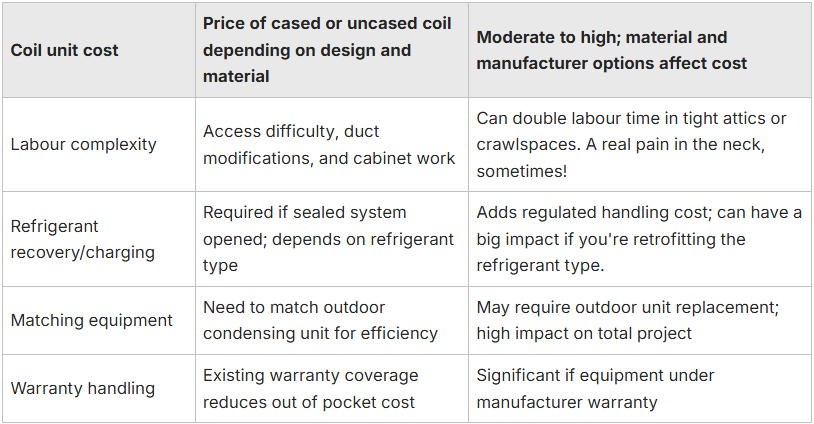
This breakdown helps you compare replacement quotes and decide whether a repair or a full replacement offers better long term value. You want to make the smart choice, right?
What Factors Influence Evaporator Coil Replacement Costs?
The replacement cost really depends on the coil type and material, how tricky the installation is, whether refrigerant recovery and recharging are needed, and if the replacement requires compatibility work with your air handler or furnace. Each of these factors influences both the parts and the labour involved. Regional labour rates and access (like if it's in the attic, basement, or a cupboard) affect the final pricing. Plus, regulatory requirements for refrigerant recovery and documentation add both time and cost. It's not just a simple swap, sometimes. Small, straightforward replacements of a cased A-coil in an easily accessed cupboard are significantly less expensive than replacing a slab coil in a confined attic space that needs a bit of duct rework. It's a fair bit more involved, that one. Recognising these drivers helps you assess quotes beyond just the headline prices. You want to know what you're really paying for, don't you?
How to Decide Between Repairing or Replacing Your Evaporator Coil?
Here's a simple rule of thumb, a bit like an ROI style check: if the repair cost approaches 50% or more of the replacement cost, and the coil is older or has multiple failure points, then replacement usually makes good economic sense. Especially when you factor in those efficiency gains and warranty handling. It's about looking at the bigger picture. Also, have a think about refrigerant compatibility. If your system uses outdated refrigerant and a replacement allows an upgrade to a modern, refrigerant compatible coil and metering device, then replacement might just be the better long term investment. Future proofing, mate! And don't forget to weigh up the expected remaining life. A new coil often restores original efficiency and cuts down the risk of those annoying short term repeat service calls, whereas repeated repairs just add up to a higher total lifecycle cost. Sometimes, a fresh start is best. These decision checks help you prioritise capital expenditure versus operational expenditure outcomes. It's all about smart money management.
What Replacement Services Does Oz Air Group Provide?
Oz Air Group offers inspection driven evaporator coil replacement services that kick off with a full diagnostic inspection, a compatibility assessment for refrigerant and metering devices, and a transparent quote detailing parts, labour, refrigerant recovery, and warranty handling. No hidden nasties, just clear pricing. Installations are performed by our certified technicians who complete post installation testing, including leak checks, pressure testing, and performance verification. So, our customers receive documented proof the system meets expected cooling and efficiency benchmarks. You'll know it's a job well done. Oz Air Group also advises on warranty transfer and recommended maintenance schedules after replacement to protect your investment and improve your evaporator coil's lifespan. We're here to help you look after your gear.
Quick tip: If you reckon your evaporator coil needs a professional inspection or replacement, give us a bell for an inspection focused quote. You can then compare repair versus replacement costs and expected efficiency outcomes. It's the smart way to go.
What Is the Difference Between an Evaporator Coil and a Condenser Coil?
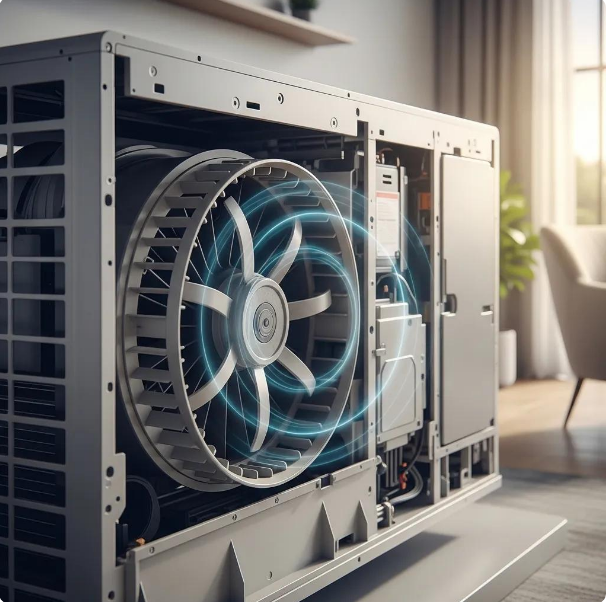
An evaporator coil absorbs heat indoors and causes refrigerant to vaporise, while a condenser coil rejects heat outdoors by condensing refrigerant back to liquid. These two coils perform opposite heat transfer roles inside the same refrigeration cycle and are essential siblings in any air conditioning or heat pump system. They're a bit like two peas in a pod, really, but doing different jobs. The evaporator is typically tucked away inside the air handler or furnace cabinet, handling the cooling and dehumidification. The condenser coil, on the other hand, sits in the outdoor condensing unit, releasing heat to the ambient air. Each has its own patch, so to speak. Recognising these location and role differences helps homeowners target maintenance correctly and understand why some issues need an indoor inspection while others need outdoor service. It's all about knowing where to look.
How Do Their Roles Differ Within the HVAC System?
The evaporator coil’s role is heat absorption and moisture removal, operating at low pressure and low temperature to vaporise refrigerant. The condenser coil’s role is heat rejection at high pressure and higher temperature as refrigerant condenses to liquid. Together they complete the refrigeration cycle via the compressor and expansion device. The compressor links these components by raising refrigerant pressure and enabling the heat flow direction, and the expansion device meters refrigerant back to the evaporator at the correct low pressure. It's a well oiled machine, when it's all working properly. Understanding these relationships helps you interpret problems, such as a warm outdoor coil indicating constrained heat rejection versus an icy indoor coil pointing to airflow or charge issues. This then directs you to the proper troubleshooting steps. It's all connected, you see.
Where Are Evaporator and Condenser Coils Located?
Evaporator coils are most commonly found inside an air handler or attached to a furnace, often tucked away in attics, basements, cupboards, or dedicated mechanical rooms. This means access and maintenance can vary a fair bit depending on where it's installed. Condenser coils, though, are usually out in the outdoor condensing unit, typically sitting on a concrete pad or up on the roof. Each has its own spot. Accessibility really affects whether routine tasks, like filter changes and a quick visual coil inspection, are something you can do yourself or if they need a technician to pop in. It also determines the labour complexity and cost when a replacement is necessary. Sometimes, getting to it is half the battle! Knowing where your coils are helps you plan safe DIY checks and recognise when it's time to schedule a professional inspection. No worries, we'll help you keep things running smoothly.
Areas we service
Oz Air covers Melbourne and its northern suburbs.

Get in touch


.png)