


.png)

How to Reduce Air Conditioner Noise


Government Rebates Now Available on Energy-Efficient Air Conditioners when Replacing your Gas Heater.
Air conditioner noise is any unwanted sound produced by HVAC components during operation, and it matters because persistent noise reduces comfort, masks HVAC faults, and can accelerate equipment wear. This guide explains how different components like the compressor, fan motor, coils, refrigerant lines, ductwork, and condensate drains and create specific sounds, shows how to diagnose those noises safely at home, and outlines DIY and professional remediation options to reduce sound levels. You will learn step-by-step diagnostic checks, practical fixes such as leveling and sound blankets, and when to escalate to professional AC repair to avoid safety or refrigerant-handling risks. The article maps common causes, a reproducible home diagnostic flow, actionable DIY repairs and soundproofing methods, comparisons of sound-dampening materials, and contemporary quiet-AC technologies to consider in 2025. Throughout, we use terms like air conditioner noise, AC compressor rattling sound, refrigerant leak hissing sound, AC drainage pipe bubbling noise, and vibration isolation to help you identify and solve problems effectively.
What Are the Most Common Causes of a Noisy AC Unit?
Air conditioner noise arises from mechanical, electrical, airflow, refrigerant, ductwork, and age-related causes; each mechanism produces characteristic sounds that help pinpoint the source. Mechanical looseness in panels or mounts creates rattling and vibration that transmit through structures, while compressor faults cause banging, humming or grinding as internal bearings or valves fail. Fan motor problems and blade contact produce screeching or buzzing, and refrigerant leaks create hissing or bubbling sounds accompanied by performance loss. Recognising these patterns reduces diagnosis time and prevents escalating damage, so begin by isolating the sound and noting when it occurs during the AC cycle. Below is a concise list of common causes and their typical noise signatures to guide initial inspection.
- Loose hardware, panels, or mounts causing rattling and vibration.
- Compressor mechanical failure producing banging, grinding, or continuous humming.
- Fan motor wear or blade contact creating screeching, buzzing, or intermittent squeals.
- Refrigerant leaks and pressure anomalies producing high-pitched hissing or bubbling.
- Ductwork expansion, loose joints, or airflow restrictions causing popping or whistling.
- Age-related wear and breakdown of insulation increasing baseline noise.
These causes form the basis for targeted diagnostics, which lead to specific DIY or professional remedies described next.
Which Loose Parts Cause Rattling and Vibrations in AC Units?
Loose screws, panels, fan shrouds, mounting bolts, and unsecured refrigerant lines commonly cause rattling and vibration by allowing relative movement between parts. Inspecting external panels and fasteners while the unit is off and secured helps identify visibly loose items; a snug, hand-level check indicates minor fixes while damaged brackets or bent mounts require professional attention. Tightening hardware with appropriate tools often resolves surface rattles, and adding vibration isolation pads beneath the unit reduces structure-borne transmission to the building frame. If noise persists after tightening, suspect internal mounts or compressor-related vibration that needs further testing by a technician.
How Do Compressor Issues Lead to Banging or Grinding Noises?
Compressor-related banging or grinding comes from internal component wear, failed bearings, or broken valves that create metallic impacts during startup and operation. These symptoms often coincide with reduced cooling, high amperage draw, or repeated hard starting and are safety-critical because continued operation can ruin the compressor and contaminate the refrigerant circuit. A qualified technician uses amp and pressure tests and may perform locked-rotor tests to determine whether repair or full compressor replacement is more economical. Early professional diagnosis prevents collateral damage to the condensing unit and piping, so don’t run the system if loud metallic noises are present.
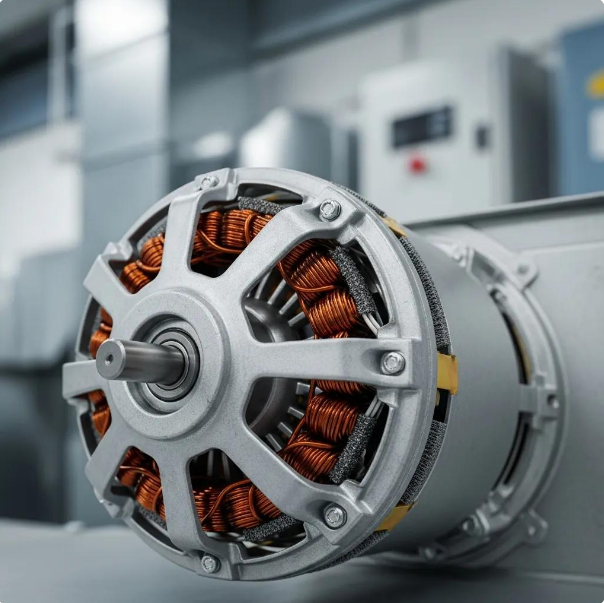
What Fan Motor Problems Result in Screeching or Buzzing Sounds?
Screeching or buzzing from the fan usually indicates bearing wear, misalignment, loose blade mounts, or debris contacting the blade during rotation. Visual inspection of blade condition and separation clearance while power is off can reveal bent blades or foreign objects; slight bearing noise may respond to lubrication when the motor is serviceable. Motors with sealed bearings or electrical faults require replacement rather than lubrication, and electrical buzzing often signals capacitor or motor winding issues requiring a professional electrician-level diagnosis. Eliminating blade contact and replacing worn motors restores smooth airflow and quiet operation.
How Can Refrigerant Leaks Cause Hissing or Bubbling Noises?
Refrigerant leaks create a sharp hissing or soft bubbling where pressure escapes through a tiny orifice, often near line fittings, valves, or coil brazes; these leaks commonly coincide with performance loss and oily residue on lines. Detecting leaks involves visual clues, soap-bubble tests at joints, or electronic leak detectors used by licensed technicians; refrigerant handling is regulated and can be hazardous, so do not attempt to add refrigerant without certification. Prompt professional leak location and repair preserve system efficiency and prevent environmental release, and once repaired, systems typically require recharging to manufacturer-specified levels.
Can Ductwork Problems Create Popping or Whistling Sounds?
Ductwork produces popping sounds from thermal expansion/contraction and whistling from small gaps, sharp bends, or register constraints that accelerate airflow. Sealing loose joints with approved mastic or foil tape, tightening hangars, and smoothing sharp transitions reduce both transient pops and continuous whistles. For persistent airflow-induced whistling, balancing dampers or resizing problematic register openings can eliminate pressure differentials causing noise. Effective ductwork fixes not only reduce sound but improve system efficiency and comfort distribution.
How Does AC Unit Age Affect Noise Levels?
As AC units age, bearings, mounts, insulation, and internal components degrade, leading to increased baseline noise and a higher frequency of mechanical failures. Older designs also lack modern sound-dampening enclosures and inverter-driven compressors that operate more quietly, so age compounds both mechanical wear and design limitations. Periodic inspections reveal when maintenance can restore quieter operation versus when replacement with a modern, quieter system is a cost-effective choice. Upgrading to variable-speed or ductless technologies often yields measurable noise reductions and improved energy performance.
How Can You Diagnose Different Types of AC Noise at Home?

A safe home diagnosis follows a structured workflow: isolate the sound, reproduce it consistently, visually inspect accessible components, document patterns (timing, pitch, location), and decide whether a DIY fix or professional service is required. Use basic tools such as flashlight, screwdriver, level, and phone voice memo to capture sound samples and physical observations before intervening. Prioritise safety: disconnect power before touching components, avoid refrigerant handling, and do not open electrical panels without qualification. The following numbered checklist offers practical diagnostic steps homeowners can perform to locate common noises.
- Isolate the noise source by turning the unit on and off and noting when noises begin.
- Record the noise using a smartphone and identify whether it originates indoors, outdoors, or in ducts.
- Visually inspect panels, fasteners, fan blades, and drain pans for loose parts or debris.
- Check condensate drain for standing water, bubble/gurgle sounds, or clogs; clear small clogs safely.
- Note associated system symptoms: reduced cooling, tripped breakers, or startup difficulty.
What Steps Identify Rattling and Vibrating Noises?
To identify rattles and vibrations, first run the system and place a palm on the base or frame to feel transmitted vibration; then switch off power and inspect external panels, screws, and bolt torque. Tighten loose hardware using appropriate hand tools and ensure panels sit flush; add rubber isolation pads beneath the unit if the pad or slab is uneven. If vibration persists after tightening, check for bent fan blades or damaged compressor mounts that require professional removal and replacement. Documenting exact locations and sound timing helps technicians perform targeted repairs.
How to Detect Compressor-Related Banging or Humming?
Detect compressor-origin noises by noting whether bangs occur at start/stop, whether a loud consistent hum accompanies operation, and whether cooling performance is degraded. Safety-first: if you suspect compressor failure, stop using the system to avoid further damage; record amp draw and any tripping behavior if you can safely access the outdoor disconnect. These observations guide a professional’s electric and pressure diagnostics and reduce needless component replacement. Accurate homeowner notes accelerate repair and minimise diagnostic time.
How to Recognise Fan Motor Screeching or Buzzing?
Fan-related screeches often appear as high-pitched tones that change with fan speed or when airflow is restricted; a brief power-off manual-spin test can reveal bearing roughness or blade imbalance. Clean debris from the fan area, straighten bent blades, and ensure blade-to-shroud clearance is consistent; if lubrication is permitted by the motor design, apply manufacturer-recommended oil sparingly. When buzzing is electrical in nature, such as from capacitors or motor windings, professional replacement provides the safest long-term fix. Proper fan function restores quiet airflow and prevents secondary vibration damage.
What Are Signs of Refrigerant Leak Noises?
Hissing or faint bubbling near joints, coils, or line connections coupled with diminished cooling, frost on evaporator coils, or oily residue indicates potential refrigerant leaks. Do not attempt to add refrigerant yourself; legal and safety reasons require licensed technician intervention for detection and recovery. Capture the sound and its location, and note performance symptoms to help expedite professional leak detection and repair. Timely repair prevents compressor damage from low-charge operation and preserves system efficiency.
How to Check for Drainage-Related Bubbling Noises Linking to Plumbing?
Locate the condensate pan and trace the drain line for standing water, gurgling sounds, or slow drainage; common household checks include clearing the trap, using a wet/dry vacuum at the external drain, or pouring a vinegar solution to discourage biological growth. If the drain line is clogged or the slope is incorrect, bubbling and overflow risks increase, potentially causing water damage and noise. Use safe methods first; persistent or inaccessible clogs require professional plumbing-level drainage service to clear or replace lines and ensure proper slope and venting. Proper drainage prevents both noise and moisture-related failures.
When Should You Call a Professional for AC Noise Diagnosis?
Call a professional when you hear metallic banging, compressor grinding, loud hissing indicative of refrigerant leaks, electrical buzzing, or when fixes require refrigerant handling or internal compressor access. Professionals deliver amp and pressure diagnostics, refrigeration leak detection, motor testing, and safe electrical inspection that homeowners should not perform. Prepare for a diagnostic visit by recording sound samples, noting when noises occur, and listing recent system behavior changes; this speeds diagnosis and reduces service time. A professional evaluation clarifies repair vs replacement decisions and prevents unsafe DIY attempts.
What DIY Solutions Can Reduce Air Conditioner Noise Effectively?
DIY noise reduction focuses on safe, homeowner-accessible fixes that reduce transmission and address minor mechanical causes without compromising airflow or safety. Common effective actions include installing vibration isolation pads, tightening loose hardware, cleaning debris around the unit, leveling the pad, and installing approved sound blankets with strict clearance rules. Each DIY fix varies by difficulty, required tools, and safety implications, so choose projects that align with your confidence and local regulations. The following table helps compare common DIY fixes so you can select appropriate actions or know when to escalate to professional AC repair.

This comparison reveals low-risk tasks suitable for most homeowners and medium-difficulty tasks where careful adherence to clearance and airflow rules is important.
Tightening and basic maintenance steps that reduce rattles and small vibrations:
- Turn power off to the unit at the disconnect.
- Inspect and tighten visible screws, brackets, and access panels.
- Replace any visibly corroded fasteners and document locations.
- Power on and re-evaluate to ensure noise reduction.
These maintenance tasks reduce many common noises and often precede deeper diagnostics when they don’t fully resolve the issue.
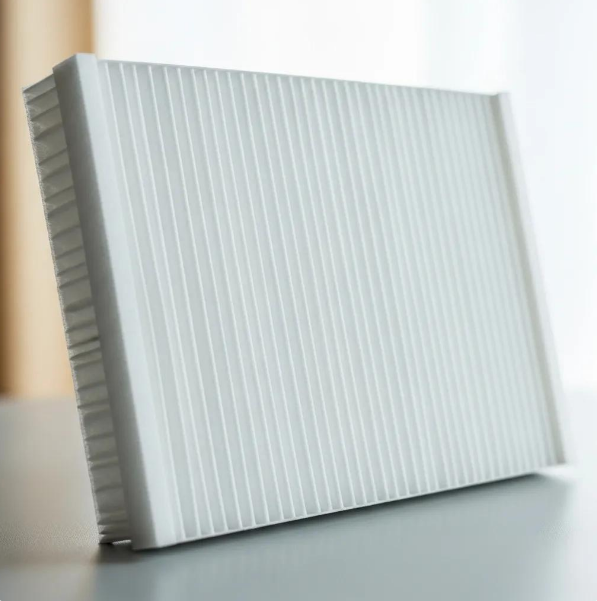
How to Install AC Sound Blankets and Compressor Covers?
Sound blankets and compressor covers reduce airborne noise by absorbing and damping compressor vibration, but they must be installed without restricting airflow to the condenser coil. Measure the compressor footprint and leave manufacturer-recommended clearance for ventilation and service access; secure blankets using non-invasive fasteners that avoid compression of fins or lines. After installation, run the system and monitor operating temperatures and pressures for any sign of overheating; if temperatures rise, remove the blanket and seek professional advice. Proper installation yields a modest dB reduction while preserving system reliability.
What Are the Best Sound Barrier and Fence Options for Outdoor AC Units?
Open-slat acoustic fences, partial enclosures with angled slats, and solid barrier walls each offer trade-offs between aesthetics, airflow, and attenuation. Open designs reduce direct line-of-sight noise while allowing crossflow ventilation, whereas solid barriers block more sound but may require increased clearance and careful airflow planning to avoid re-circulating hot air. Use materials resistant to weather and maintain service access panels and gates for technicians; account for local permits or homeowner association rules. Thoughtful placement of barriers combined with landscaping can significantly reduce perceived noise without compromising performance.
How Does Regular AC Maintenance Prevent Noise?
Regular maintenance like filter changes, coil cleaning, fan and motor inspection, and verification of mounts and refrigerant charge prevents the progressive wear that leads to louder operation. A seasonal maintenance cadence reduces the chance that small faults evolve into noisy failures like bearing seizure or compressor stress. Maintenance visits are also opportunities to document baseline noise levels and detect trends that indicate imminent mechanical or refrigeration issues. Consistent preventive care prolongs quiet operation and reduces long-term repair costs.
How to Level and Secure Your AC Unit to Minimise Vibrations?
Level the unit on a rigid pad and use rubber vibration isolation pads or perimeter-mounted spring hangers to decouple unit movement from building structure. A level ensures balanced fan operation and even load on compressor mounts, while isolation pads absorb low-frequency vibration transmitted through concrete or wood. Use durable, UV-resistant pads sized to the unit weight and check pad condition annually; if foundation settlement or slab cracking is present, consult a professional for structural correction. Proper mechanical isolation dramatically reduces transmitted rattles and low-frequency hum.
What Cleaning Techniques Remove Debris Causing Noise?
Cleaning removes leaves, twigs, and accumulated dirt that contact fan blades or impede coil airflow, which produce scraping or buffeting noises. With power off, remove debris from the fan area, gently rinse fins with low-pressure water, and clear the immediate surrounding area to ensure unobstructed intake. Use protective gloves and avoid fin damage; take care not to introduce water into electrical components. A clean condenser and evaporator enable smooth airflow and reduce noise caused by turbulence and obstruction.
How to Optimise AC Unit Placement for Quieter Operation?
Place outdoor units away from direct proximity to bedrooms or living areas, preferably near external walls shielded by landscaping or fencing, and ensure the pad sits on solid, level ground. Elevating slightly above grade reduces ground-transmitted noise and prevents water ingress, while gaps to combustible materials and vents must meet safety codes. For retrofits, consider relocating units further from sensitive areas and using ducting or louvered screens to redirect sound; consult a technician for feasibility and load calculation impacts. Strategic placement and barriers reduce perceived noise with minimal effect on efficiency.
When Should You Consider Professional AC Noise Repair and Maintenance?
Professional AC noise repair is warranted when noise indicates mechanical failure, electrical hazards, refrigerant leaks, or when safe DIY measures don’t resolve the issue; technicians provide diagnostic tools and repair capabilities not available to homeowners. Typical outcomes of a professional diagnostic include targeted component repair or replacement, refrigerant leak detection and sealing, motor or compressor replacement, duct sealing, and vibration mitigation. Scheduled maintenance offers long-term noise control through systematic inspection and corrective actions that preserve system life. Below is a numbered list of red-flag signs that justify immediate professional service.
- Loud metallic bangs or grinding noises coming from the compressor.
- Persistent hissing suggesting refrigerant leaks combined with cooling loss.
- Electrical arcing, burning odors, or recurrent tripped breakers.
- Uncontrollable vibration after tightening and isolation attempts.
- Drain overflow or repeating condensate bubbling indicating plumbing-level failure.
What Are Signs That AC Compressor Repair or Replacement Is Needed?
Signs of compressor failure include loud metallic noises at startup, inability to maintain pressure, high electrical amperage draw, and repeated motor short-cycling. Technicians perform pressure, temperature, and amp-draw tests to determine whether repair (bearing or valve work) or replacement is the appropriate solution based on condition, cost, and remaining system life. Replacing a failing compressor often involves system evacuation and refrigerant handling that must be done to code; choosing replacement balances repair cost against expected improvements in noise and efficiency. Documented diagnostic data helps homeowners evaluate cost-effectiveness.
How Do Professionals Fix Fan Motor and Electrical Noise Issues?
Professionals isolate electrical noise sources using multimeters, megohmmeters, and motor analysers, then replace failing capacitors, bearings, or motors as needed; they also verify safe wiring and secure connections. Motor replacement follows manufacturer specifications for mounting, alignment, and electrical protection, and technicians test operation under load to confirm noise elimination. Licensed professionals adhere to safety standards for lock-out/tag-out and ensure replacement parts match original equipment ratings, minimising recurrence. Post-repair testing validates both quiet operation and safe electrical performance.
What Does AC Ductwork Noise Repair Involve?
Duct noise repair includes sealing leaks with mastic, reinforcing loose joints and hangers, insulating sections to reduce vibration, and balancing airflow to prevent pressure-driven whistles. Technicians may install flexible connectors or sound-attenuating liners and adjust register sizes to smooth turbulent flows. Properly balanced and sealed duct systems reduce popping, whistling, and structure-borne vibration, and measurable improvements in sound and comfort follow professional sealing and reinforcement. A duct audit reveals priority fixes that deliver the best noise-to-cost improvements.
How Does Oz Air Group Provide Expert AC Noise Diagnostics and Repair?
Oz Air group approaches AC noise through a systematic diagnostic workflow that isolates acoustic signatures, inspects mechanical and refrigeration systems, and integrates plumbing checks when condensate or drainage symptoms appear. From the homeowner’s perspective, this coordinated HVAC and plumbing capability simplifies addressing bubbling or gurgling drain noises and ensures repairs, including AC condensate drain line repair are handled in a single diagnostic visit when appropriate. Customers receive a prioritised set of options with expected outcomes and maintenance recommendations focused on durable noise reduction. For complex compressor or refrigerant issues, Oz Air group aligns testing and repair sequences to minimise downtime and future recurrence.
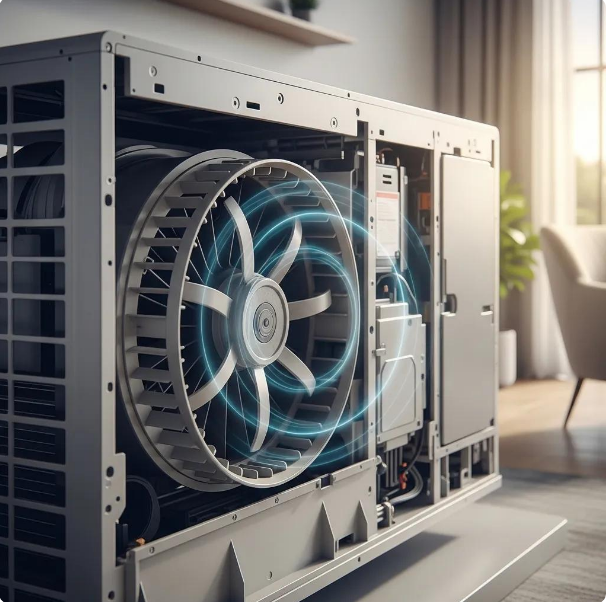
Which Quietest Air Conditioner Models and Technologies Reduce Noise Best?
Quiet AC performance in 2025 centers on inverter-driven variable-speed compressors, manufacturer sound-dampening features, and system design choices like ductless mini-splits that relocate noisy components outdoors or distribute quieter indoor units. Variable-speed compressors reduce cycling noise by operating at lower continuous speeds and smoothing startup transients, while ductless systems eliminate duct noise and often deliver lower indoor sound levels. When selecting a quiet model, compare rated sound levels (dB), SEER efficiency, and presence of factory acoustic options; consider consulting professionals for load calculations and installation planning. The table below helps compare technology attributes for homeowner selection.

What Are the Benefits of Inverter and Variable-Speed Compressors?
Inverter and variable-speed compressors reduce noise by modulating output smoothly instead of cycling on/off at full power, which lowers startup transients and maintains steady, lower-speed operation. The continuous modulation also improves efficiency and comfort by reducing temperature swings that prompt loud cycling. For homes with frequent partial-load conditions, inverter technology yields both quieter operation and measurable energy savings. When noise is a primary concern, specifying inverter-driven equipment combined with proper installation places the loudest components farther from sensitive areas.
How Do Ductless Mini-Split Systems Offer Quieter Operation?
Ductless mini-splits offer very low indoor sound levels because the compressor resides outdoors and indoor blowers are designed for whisper-quiet operation, often below typical conversation levels. Outdoor compressors still generate sound, so placement and sound mitigation remain important, but the perceived indoor noise reduction is substantial compared to central systems. Mini-splits also allow multi-zone control, so quiet zones can remain insulated from noisy equipment operation. For retrofit or room-specific cooling, ductless systems deliver excellent noise performance with efficient zoned comfort.
What Are ENERGY STAR Quiet AC Models to Consider in 2025?
ENERGY STAR criteria emphasize efficiency; when paired with low dB ratings and inverter technology, these models offer a balance of quiet performance and energy savings. Instead of specific model names, compare manufacturer dB specs for outdoor and indoor units, confirm inverter or variable-speed compressors, and look for factory acoustic options. An installer-led selection process that includes measured sound levels and a site plan ensures the quietest model is also correctly sized and placed. Prioritising rated sound and modulation capability helps homeowners choose the lowest-noise, highest-efficiency option.
How Do Sound Dampening Features Like Carrier’s Silencer System Work?
Factory sound-dampening systems use acoustic enclosures, internal baffling, vibration-isolated mounts, and tuned cabinet insulation to target dominant frequencies produced by compressors and fans. These design elements reduce both airborne and structure-borne noise without restricting airflow when engineered correctly. Manufacturer systems complement external measures like fences or MLV by addressing noise at the source and often carry tested dB reductions. When sound is a priority, selecting factory-engineered acoustic options simplifies achieving reliable noise reduction.
How to Choose the Best Quiet AC Model for Your Home?
Choose a quiet AC by prioritising rated sound levels, inverter/variable-speed capability, correct sizing from load calculations, and installer expertise in placement and duct or piping routing. Balance budget and noise goals: higher-end inverter systems and mini-splits cost more upfront but deliver greater noise and efficiency benefits over time. Consult a trained technician for a site-specific recommendation that accounts for location, neighbors, and service access. Proper selection and installation are the most effective long-term strategy for achieving quiet comfort.
How Can Plumbing Expertise Help Address AC Noise Related to Drainage Issues?
Plumbing expertise matters because many drainage noises such as bubbling, gurgling, or overflow originate in condensate traps, improper slopes, clogged lines, or venting issues that sit squarely in plumbing practice. Addressing these requires both HVAC knowledge to access pans and coils and plumbing skills to clear or reconfigure lines, replace traps, or install condensate pumps. Integrating the trades reduces diagnosis time and avoids repeated callbacks when noise and water management overlap. The table below summarises common drainage problems and typical plumbing remedies.

What Causes Bubbling or Gurgling Noises from AC Drain Lines?
Bubbling or gurgling stems from traps holding air, partial clogs causing intermittent flow, improper slope that allows pockets of water, or venting issues that trap air under suction. Inspect the drain pan for standing water and listen at the trap or exit point while the system runs; intermittent gurgling during heavy condensate production suggests partial restriction. Clearing the trap or replacing damaged piping typically removes the noise, and correcting slope prevents recurrence. Because standing condensate risks microbial growth and water damage, address drainage noise promptly.
How Does Oz Air Group Combine HVAC and Plumbing Services for Noise Solutions?
Oz Air group combines HVAC and plumbing diagnostics to resolve condensate-related noises efficiently by inspecting both the pan/coils and the drain plumbing in a single coordinated assessment. This integrated approach enables solutions such as AC condensate drain line repair alongside HVAC repairs like drain pan replacement or pump installation, reducing repeat visits and ensuring durable fixes. Customers benefit from a unified scope of work that treats noise and moisture symptoms as linked problems rather than separate trades. Coordinated service streamlines repairs and helps prevent water-related secondary damage that amplifies noise concerns.
What Are Effective Repairs for Clogged or Leaking AC Drainage Pipes?
Effective repairs include clearing blockages with a wet/dry vacuum or snake, replacing failing trap assemblies and corroded pipe sections, sealing joints with appropriate solvents or fittings, and installing condensate pumps where gravity flow is inadequate. Use durable materials suited to indoor conditions and install accessible clean-outs to simplify future maintenance. After repair, test under full condensate load to confirm quiet, reliable drainage. Proper repairs remove bubbling noise sources and reduce the risk of overflow and associated damage.
How to Prevent Drainage-Related Noise Through Regular Maintenance?
Prevent drainage noise by scheduling periodic inspection and cleaning of traps and drain lines, keeping the area around the indoor unit clear, and treating lines to reduce biological buildup where local conditions encourage growth. Homeowners can periodically pour a mild vinegar solution through the trap or use manufacturer-recommended enzymatic cleaners to keep lines flowing. Professional maintenance should include verifying slope, testing condensate flow under load, and inspecting pumps and safety switches. Preventive actions reduce noise and protect against costly water damage.
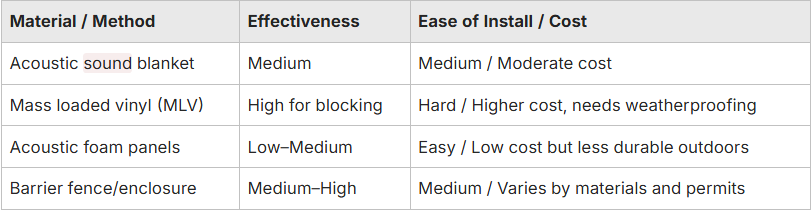
What Are the Best Soundproofing Materials and Methods for Outdoor AC Units?

Effective outdoor AC soundproofing balances attenuation with required airflow and service access; materials include acoustic blankets, mass loaded vinyl (MLV), foam panels, and barrier fences or partial enclosures sized and installed to preserve ventilation. Each option trades off cost, ease of installation, effectiveness, and potential impact on condenser performance, so selection follows a measured approach. The table below compares common materials and methods to guide choices based on effectiveness, ease of installation, and impact on airflow.
How Effective Are AC Sound Blankets and Compressor Covers?
Sound blankets and compressor covers can reduce certain broadband noise frequencies and provide modest dB reductions when designed for exterior weather exposure; however, they must not impede condenser airflow or service access. Measured reductions are moderate, and blankets are best used as part of a multi-pronged approach that includes vibration isolation and barrier placement. Regular inspection ensures blankets do not retain moisture or degrade, which could harm the unit or reduce effectiveness. When applied correctly, sound blankets offer a practical, reversible mitigation.
What Are the Pros and Cons of Sound Barrier Fences and Enclosures?
Open-slat acoustic fences reduce direct sound projection while maintaining cross-ventilation; solid enclosures provide greater blocking but require careful ventilation planning to prevent heat buildup. Pros include higher attenuation and aesthetic integration; cons include potential airflow restriction, permit requirements, and reduced service access if poorly designed. Design fences with angled baffles or offset openings to maintain the required clearance and incorporate hinged access panels for servicing. A well-designed fence can substantially lower perceived noise without compromising function.
How Does Insulation Like Mass Loaded Vinyl and Foam Panels Reduce Noise?
MLV blocks airborne sound by adding mass to partitions and fencing, while foam panels absorb mid-to-high frequencies to reduce reverberation; they serve different roles and are often combined for best results. MLV performs well as a barrier but must be weatherproofed and supported to prevent sagging, whereas foam requires UV-protected coverings for outdoor durability. Use MLV in external barrier layers and foam in protected enclosure interiors to balance blocking and absorption. Proper installation ensures materials withstand outdoor conditions and do not trap heat against the condenser.
How to Properly Install Soundproofing Without Affecting AC Performance?
Follow rules of thumb: maintain manufacturer-recommended clearances, ensure crossflow ventilation, avoid covering coils or obstructing fan intake/exhaust, and provide unhindered service access. Post-installation, monitor operating pressures and temperatures for any adverse effects and inspect annually for material deterioration or moisture retention. Use non-invasive mounting and incorporate removable panels for maintenance. Proper integration preserves performance while delivering noise reduction.
What Are Cost Considerations for Different Soundproofing Options?
Cost varies widely: DIY sound blankets are moderate cost, MLV and professional enclosures are higher, and fences depend on materials and labor; permit or HOA costs may add to total. Consider ROI by matching solution cost to noise severity and longevity: temporary noise reduction may favor blankets, while persistent issues near sensitive rooms justify higher investment in engineered enclosures. Factor in installation labor, potential need for electrical or structural work, and long-term maintenance when comparing options. A staged approach starts with low-cost isolation and escalation is often most cost-effective.
For a professional noise assessment or tailored installation plan, Oz Air group can provide AC noise assessment and maintenance plans to help prioritise fixes and implement durable sound reduction measures. Contact Oz Air group to schedule an AC noise diagnostics visit or to discuss combined HVAC and plumbing solutions; a professional assessment clarifies trade-offs and delivers a safety-checked remediation roadmap.
Areas we service
Oz Air covers Melbourne and its northern suburbs.

Get in touch


.png)